When trip planning, every site on a 2D map looks like a winner. But as any seasoned traveler knows, a black dot on a PDF doesn't tell you about the low-hanging oak branch, the 10° slope of the pad, or the utility pedestal located exactly where your slide-out needs to be. To reach a Best-Case Scenario arrival, you need to move past the Hypothetical and see the Reality of the site before you click "Reserve."
Previewing a site is the ultimate act of Acknowledgment. It’s admitting that "Conditions Are Not Neutral" and that your specific Mechanism (your RV) has unique requirements.
1. Ditch the 2D "Symbolic" Map
The Mistake: Relying on a hand-drawn park map or a static overhead satellite image.
-
The Reality: A satellite view from 20,000 feet can’t show you the height of a stump or the depth of a pothole. A park map is a Symbolic Control; it shows you where the site is, but not what it is.
-
How to Avoid It: Look for "Ground-Level" perspectives. You need to see the "Moving Parts" of the site—the turn radius into the driveway and the clearance for your awnings.
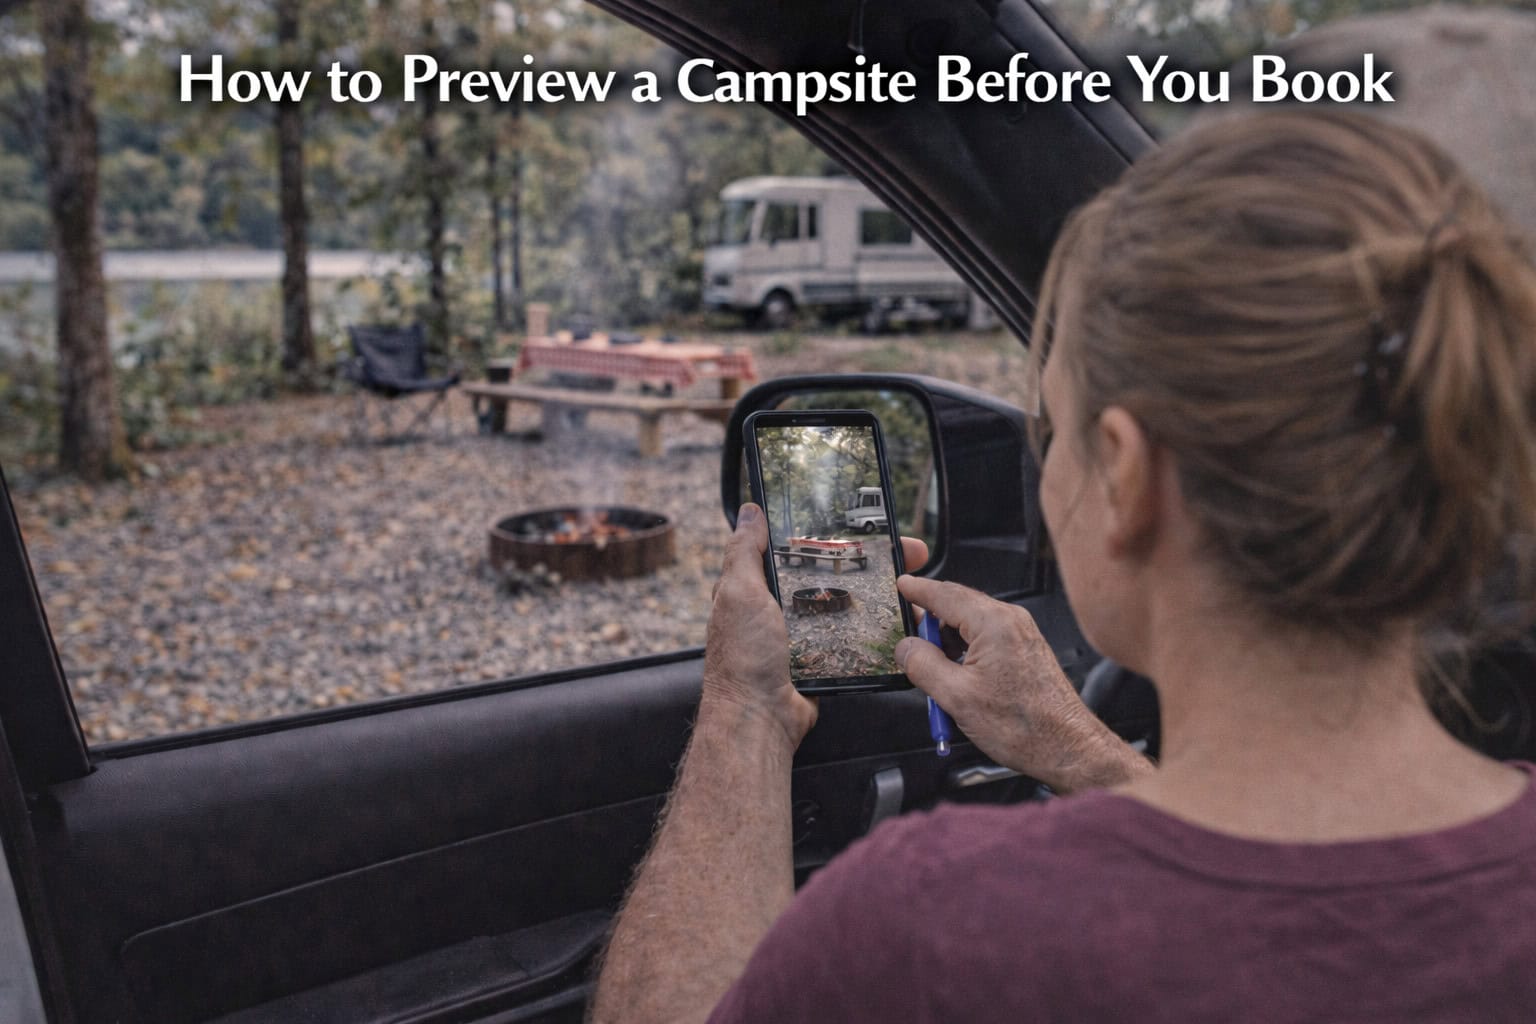
2. Perform a "Virtual Walk-Through"
The Mistake: Booking based on a single "Hero Shot" of the park’s best site.
-
The Reality: Most parks feature their "Best-Case" site in marketing photos. Your actual site—Site 14—might have a completely different Vibe or utility layout.
-
How to Avoid It: Use 360-degree video tools. This allows you to "stand" in the site and rotate your view. Can you see the neighbors? Is there a privacy buffer? Is the "Livable" space actually functional for your family?
3. Audit the "Utility Anatomy"
The Mistake: Assuming the power and water are in a "Standard" location.
-
The Reality: On older sites, the sewer connection might be at the very front of the pad, or the power pedestal might be shared between two sites. If your hoses aren't long enough, your Stability is compromised.
-
How to Avoid It: When previewing, look specifically for the "Mechanism" of the utilities. Note their distance from where your rig’s connections sit. If the Readout Is Confident that your 20-foot hose will reach, you’ve saved yourself a "Firefighting" trip to the local hardware store.
4. Check the "Level & Grade"
The Mistake: Assuming a "Level" site actually is.
-
The Reality: Paved sites can settle, and gravel sites can wash out. If a site has a "Slight Shift" in its grade, your auto-levelers might lift your tires off the ground—a safety risk for your Moving Parts.
-
How to Avoid It: Look at the horizon line in a 360-degree photo. Does the picnic table look tilted? Are there "Guest Hacks" (piles of wood blocks) left behind by the previous occupant? These are visual cues that the site requires extra Attention.
Key Tip: The "Slide-Out Stick" Virtualization. When looking at a 360-degree preview, imagine your slides are out. Is that utility box or tree trunk going to be a "Slide-Out Surprise"? If the space feels tight in a photo, it will feel even tighter in Reality.
Final Thoughts
Previewing a site is about more than just "Looking." It’s about Interpretation. When you take the time to virtually inhabit a space before you book, you eliminate the "Emotional Time" wasted on arrival anxiety. You transition from "Operating on Assumptions" to a state of total operational confidence.
Don't just book a site; verify a destination.
🐟 Want the gold standard in campsite previews? Stop guessing and start seeing. CampgroundViews.com provides the world's largest library of 360-degree virtual tours, allowing you to "drive" through the park and inspect every site in high-definition. See the trees, the hookups, and the layout before you spend a dime.
See your site at CampgroundViews.com!