
Sealing your RV's windows, roof vents, and seams is crucial for preventing leaks, maintaining energy efficiency, and ensuring a comfortable and safe environment. Whether you're a new RV owner or just looking to give your trusty rig a little TLC, here's your beginner's guide to doing it right.
🛠️ Why Seal Your RV?
Moisture is the enemy of your RV. It can lead to mold, water damage, and a host of other issues that are expensive and time-consuming to fix. Sealing your RV properly:
-
Prevents water damage: Keeps water out where it belongs—outside.
-
Increases energy efficiency: Seals keep your air conditioning inside in the summer and cold air out in the winter.
-
Protects structural integrity: Moisture can weaken your RV’s framework over time.
🔍 Materials You’ll Need
Before you start, you'll need the right materials. Here’s what to gather:
-
Silicone sealant or caulking: Make sure it’s suitable for exterior use and compatible with your RV’s materials.
-
Caulking gun: For applying the sealant.
-
Putty knife: To remove old caulking.
-
Cleaner and cloth: To prep the surfaces.
-
Masking tape: To keep lines straight and clean.
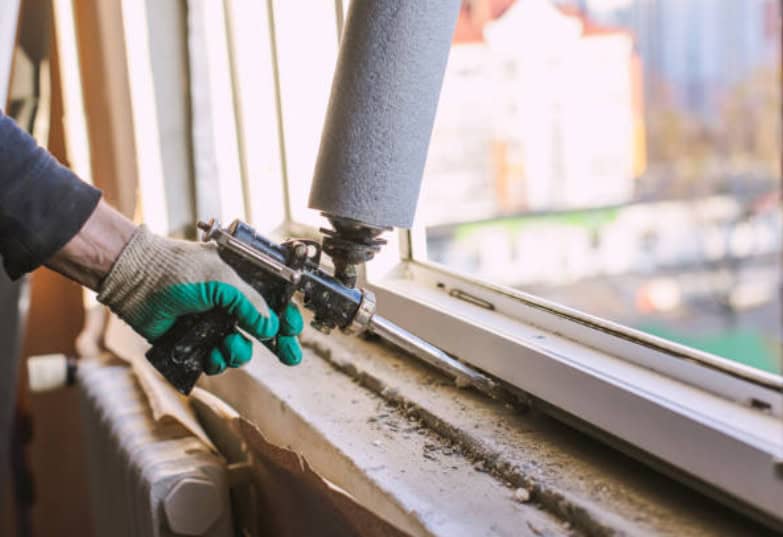
🪟 Sealing Windows
-
Clean the Area: Remove any old sealant with a putty knife, clean the surface thoroughly, and let it dry.
-
Apply Tape: Use masking tape to line the edges where you’ll apply new sealant, ensuring a clean line.
-
Apply Sealant: Cut the tip of the sealant tube at a 45-degree angle. Insert it into the caulking gun and apply the sealant smoothly and evenly.
-
Smooth the Sealant: Use a wet finger or a smoothing tool to press the sealant into the gap and smooth it out.
-
Remove Tape: Carefully remove the masking tape while the sealant is still wet.
🚐 Sealing Roof Vents and Seams
-
Inspect and Clean: Check for cracks or gaps in existing sealant. Clean the area around the roof vents and seams.
-
Remove Old Sealant: If the old sealant is cracked or peeling, use a putty knife to remove it.
-
Apply New Sealant: Use a self-leveling sealant for the roof, as it will spread out evenly over irregular surfaces.
-
Ensure Coverage: Make sure all edges and corners are well-covered to prevent water ingress.
🛠️ Tips for a Successful Seal
-
Do it on a dry day: Moisture can prevent sealants from curing properly.
-
Don’t skimp on prep work: A clean and dry surface is key to ensuring the sealant adheres properly.
-
Inspect annually: Make checking and maintaining seals part of your regular RV maintenance.
🧐 Final Thoughts
Taking the time to properly seal your RV can save you a lot of hassle and expense down the road. It’s a straightforward process that can greatly extend the life and comfort of your RV. Plus, it gives you peace of mind knowing that your home-on-wheels is tight and dry, no matter where your travels take you.
Want a printable checklist for your RV sealing project or a video tutorial on how to seal different types of RV exteriors? Let me know—I'm here to help make your RV journey as smooth as possible!