
If you’ve ever drilled a hole, pulled a screw, or wondered why a light flickered—you’ve probably thought:
“What’s behind this wall?”
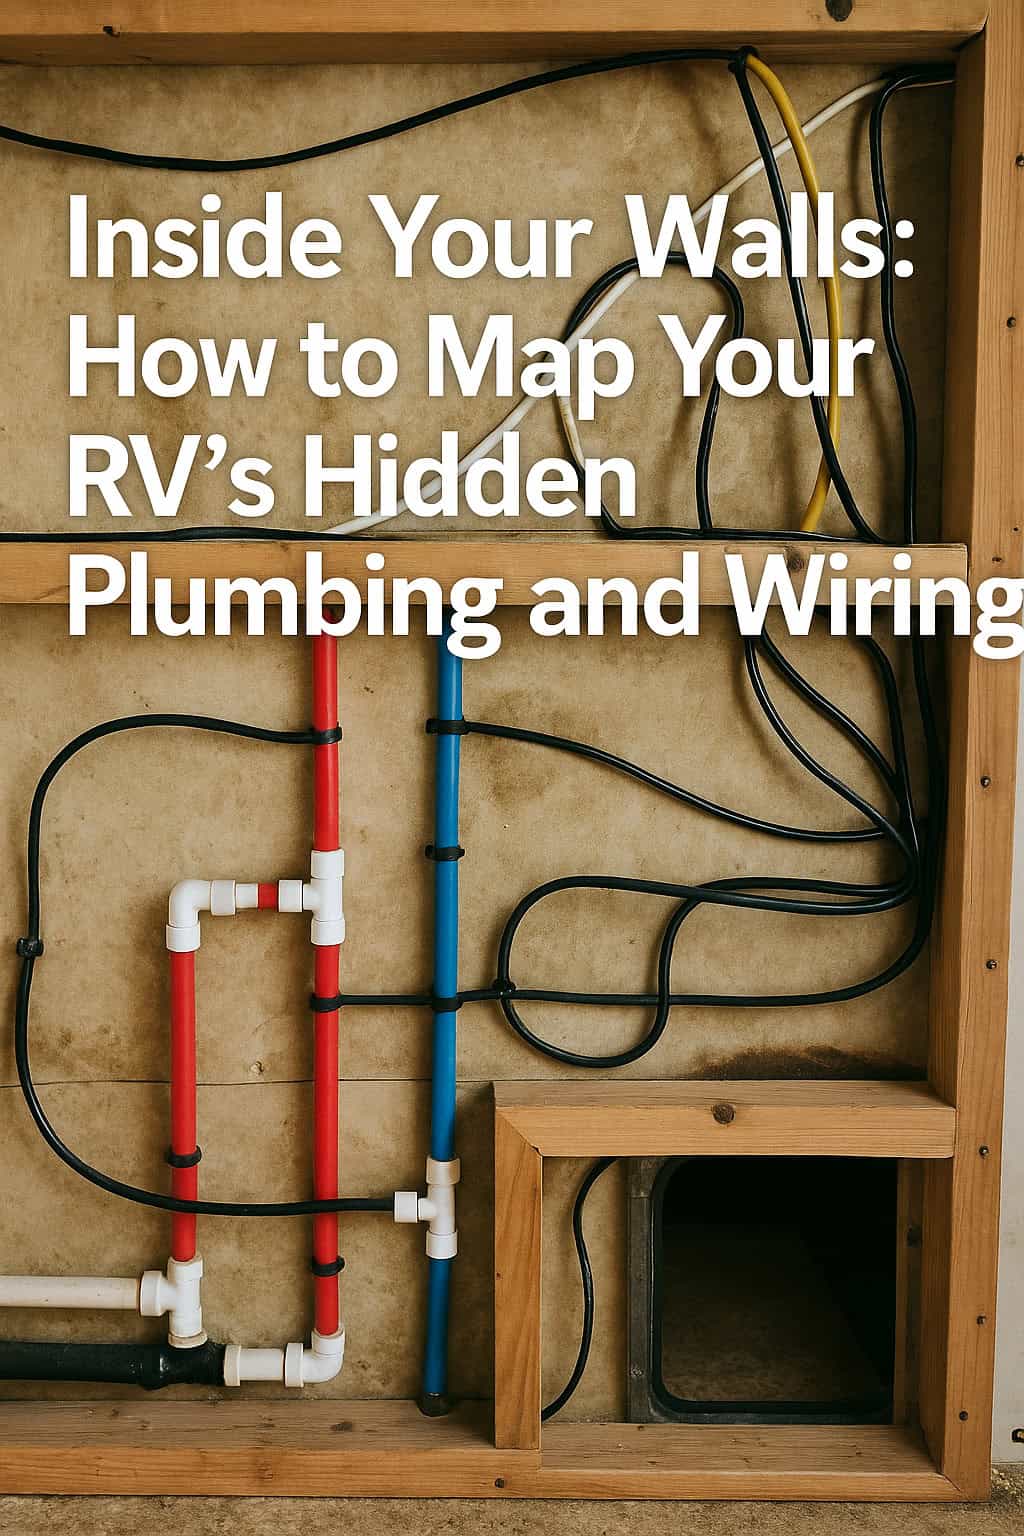
Unlike houses, RVs pack electrical and plumbing lines into every inch of space. And while you could guess where things go… it’s smarter (and safer) to map it out.
Here’s how to create your own visual “map” of your RV’s hidden systems—before a repair turns into regret.
🧰 Why It’s Worth Doing
-
You’ll avoid accidental damage when drilling or mounting
-
Troubleshooting is way faster when you know where lines run
-
You’ll be ready if you ever sell, upgrade, or replace components
-
Some RV manuals don’t include detailed layouts—or are just plain wrong
🧭 Step-by-Step: Mapping Your RV’s Internals
1. Start With Manufacturer Info
Search for:
-
Wiring diagrams (look for PDFs online by year/model)
-
Plumbing schematics
-
Owner forums or Facebook groups where others may have mapped theirs
Even a partial diagram is a great place to begin.
2. Use Access Panels & Compartments
Open what you can:
-
Under-bed storage
-
Water heater access
-
Battery bays
-
Basement pass-throughs
Take photos of exposed wiring/plumbing and note the direction it runs.
3. Trace From Fixtures
For plumbing:
-
Follow your faucet to the cold/hot water source
-
Flush and listen—track the route to your black tank
-
Check under sinks and behind removable panels
For wiring:
-
Turn on a light and trace its wire to where it connects
-
Test outlets using a circuit tester
-
Follow the wires coming from your converter or fuse box
4. Label and Diagram
Use:
-
Painter’s tape + Sharpie (non-permanent)
-
Photos with arrows/notes using your phone
-
A digital diagram (use apps like Notability, or draw on top of RV layout)
You’re building a visual that shows:
Where things start, route through, and end.
5. Test It With Real Use
Run every system one at a time:
-
Water pump
-
Furnace and A/C
-
Outlets + lights
-
Slide-outs or leveling jacks
Take notes if something triggers another system—it’s often more connected than it looks!
💡 Bonus Tips
-
Use a stud finder or inspection camera to peek deeper
-
Take extra photos during any future repairs
-
Keep this info in your RV binder or phone for fast reference
🧠 Final Thoughts
You don’t need to be an electrician or plumber to map your RV—you just need patience, curiosity, and a phone camera.
And once you do?
You’ll be able to tackle upgrades, repairs, or emergency fixes with confidence.
Because in RV life, what you can’t see can absolutely hurt you… unless you map it first. 🛠️🚐📍
🐟 Explore RV layouts and smart system routing on Campground Views’ featured rig tours—helping you choose the right floorplan with smarter service access.
🔗 Follow us for DIY RV knowledge, system tips, and lessons from full-timers who learned the hard way.