Owning an RV means having the freedom to explore, but it also comes with its share of maintenance and repairs. The good news? Many common RV issues can be fixed without calling a professional. With a little know-how and some basic tools, you can save time and money by tackling minor repairs on your own. Here are some frequent RV problems and step-by-step guides to solve them.
1. Fixing a Flat Tire
Why It Happens:
Flat tires can occur from debris, punctures, or improper inflation.
What You’ll Need:
- Lug wrench
- Hydraulic jack (rated for your RV’s weight)
- Spare tire
- Tire pressure gauge
Steps to Fix:
- Pull Over Safely: Stop on a level surface away from traffic and engage the parking brake.
- Loosen Lug Nuts: Before lifting the RV, slightly loosen the lug nuts on the flat tire.
- Jack Up the RV: Place the jack under the designated lift point and raise the RV until the flat tire is off the ground.
- Remove and Replace: Take off the lug nuts and flat tire, then install the spare.
- Tighten and Lower: Hand-tighten the lug nuts, lower the RV, and finish tightening with the wrench in a star pattern.
- Check Pressure: Use the tire pressure gauge to ensure the spare is properly inflated.
Pro Tip: Practice changing a tire in a safe environment to get comfortable with the process.
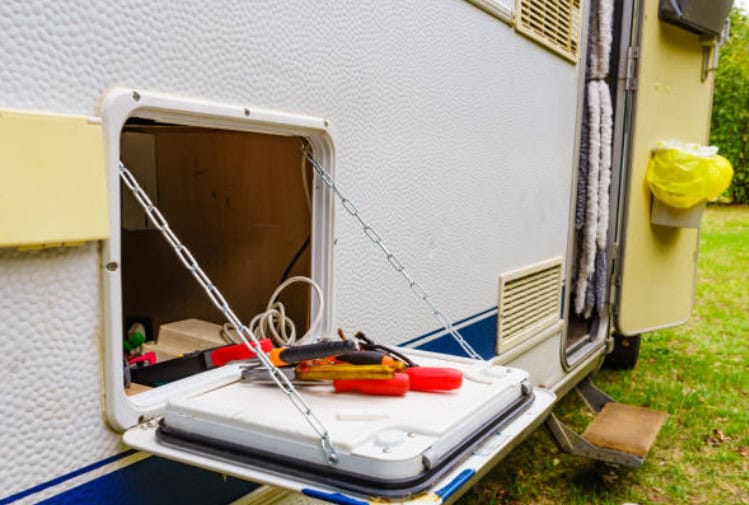
2. Repairing Minor Leaks
Why It Happens:
Leaky roofs, windows, or seams can result from aging seals or harsh weather conditions.
What You’ll Need:
- RV sealant (self-leveling for roofs, silicone for windows)
- Caulking gun
- Clean rag
Steps to Fix:
- Locate the Leak: Inspect the roof, seams, and windows to find the source. Look for cracks or gaps.
- Clean the Area: Wipe the area around the leak to ensure proper adhesion for the sealant.
- Apply Sealant: Use the caulking gun to apply a generous amount of sealant over the crack or gap. Smooth it out for even coverage.
- Let It Cure: Allow the sealant to dry according to the product instructions before exposing it to rain or washing.
Pro Tip: Regularly inspect seals and reseal any areas showing signs of wear to prevent leaks before they happen.
3. Unclogging a Clogged RV Toilet
Why It Happens:
Improper flushing or buildup in the black tank can lead to blockages.
What You’ll Need:
- RV toilet wand
- Tank-safe enzyme treatment
- Gloves
Steps to Fix:
- Empty the Black Tank: Drain the black tank at a dump station to remove as much waste as possible.
- Use a Toilet Wand: Attach the wand to a hose, insert it into the toilet, and spray to break up the clog.
- Add Enzyme Treatment: Pour a tank-safe enzyme treatment into the toilet to help dissolve any remaining waste.
- Flush the System: Fill the tank with water and flush it thoroughly to remove all debris.
Pro Tip: Prevent clogs by using RV-friendly toilet paper and regularly treating the black tank with enzymes.
4. Fixing a Malfunctioning Water Pump
Why It Happens:
A water pump may stop working due to loose connections, airlocks, or a worn-out pump.
What You’ll Need:
- Screwdriver
- Multimeter
- Replacement pump (if necessary)
Steps to Fix:
- Check the Connections: Inspect the wiring and connectors to ensure they’re secure. Tighten any loose screws.
- Bleed Air from the System: Open faucets to release trapped air that might be causing the pump to shut off.
- Test the Pump: Use a multimeter to check if power is reaching the pump. If not, you may need to replace a fuse.
- Replace the Pump: If the pump itself is faulty, disconnect it, install a new one, and test the system.
Pro Tip: Keep a spare water pump on hand, especially if you camp in remote areas.
5. Replacing a Broken RV Awning Strap
Why It Happens:
Awning straps can wear out or snap over time due to UV exposure or frequent use.
What You’ll Need:
- Replacement strap
- Screwdriver
- Awning lubricant
Steps to Fix:
- Retract the Awning: Roll the awning in to access the strap connection points.
- Remove the Old Strap: Use the screwdriver to detach the strap from its mounting bracket.
- Attach the New Strap: Secure the new strap in place with screws, ensuring it’s tight.
- Lubricate the Awning: Spray lubricant on moving parts to keep the awning operating smoothly.
Pro Tip: Inspect your awning regularly and replace parts as needed to prevent larger repairs.
Final Thoughts
Being able to handle minor repairs yourself is a valuable skill for any RV owner. With the right tools, knowledge, and a bit of confidence, you can tackle common issues and keep your rig road-ready. Not only will you save money, but you’ll also gain the peace of mind that comes with self-sufficiency.
Happy RVing and safe travels! 🚐✨
